You’ve got this! Start by sizing your DIY rabbit hutch well: aim for about 1.5 sq ft for under 4.4 lb, up to 5 sq ft for bigger rabbits, and build higher around 14 in. Use sturdy 2×4 frames, 3/4 in plywood for floors/walls, then wrap every run area in 1/2 in hardware cloth (not chicken wire). Add solid resting panels, weatherproof the roof, and build a door with tight, raccoon-proof latches. Want the exact cut list and safer build steps next?
Swift Summary
- Use a size plan based on rabbit weight (e.g., ~3 sq ft for 4.4–8.8 lb) and aim for at least ~14 in height.
- Follow a simple lumber package: ~2×4×8′ studs, 2×2×8′ rails/frames, and 1–2 sheets 3/4″ plywood for floor and main walls.
- Install predator-proof 1/2″ hardware cloth (16-gauge), stretch tightly, and reinforce the bottom edge to resist digging.
- Build a solid non-wire resting area to prevent sore hocks, using bedding like paper litter, hay, or straw.
- Plan ventilation and a waterproof roof with overhangs, plus secure raccoon-proof latches and protected wiring for safety.
Pick the Right DIY Rabbit Hutch Size for Your Rabbits
Before you cut any wood, you’ve gotta pick the right DIY rabbit hutch size for your rabbits, because space directly affects comfort and welfare. When you search free rabbit hutch plans, remember they’re starting points, not promises. How to make a rabbit hutch starts with matching floor space to weight. Under 4.4 lb needs 1.5 sq ft, 4.4–8.8 lb needs 3 sq ft, 8.8–11.9 lb needs 4 sq ft, and over 11.9 lb needs 5 sq ft, with about 14 in height. Bigger is best for sleeping/leisure space. For two average rabbits, aim for the enclosed area around 6 ft x 2 ft x 2 ft, and if it’s diy rabbit hutch outdoor, add a run about 3 m x 2 m x 1 m.
Gather Materials and Cut a Simple Lumber List
Start by grabbing the exact lumber sizes and quantities for your frame, legs, and base supports—most simple builds use 2×2s (about 40 ft total) with a few 2×4s, plus 4×4s if you want extra-sturdy posts. Then pick your wire and fasteners, since “hardware cloth” (thick wire mesh) and the right deck screws, hinges, and latches make the whole hutch secure—use 30″ wide, 14–16 gauge rabbit wire for the main run, or 1/2″ hardware cloth for predator-resistant areas. DIY pallet hutch uses rabbit floor wire that’s 30-inch-wide by 10-foot-long. But before you cut, lay out a quick cutting list for a single-hutch build, mark each board length, and measure twice so your plywood floor panels (like a 36″×48″ 3/4″ sheet) fit cleanly.
Lumber Sizes And Quantities
Once you’ve picked your simple DIY rabbit hutch plan, gather your lumber like you’re building a puzzle with clear edges.
For an easy rabbit hutch build, buy a compact package. Get 4–5 pieces of 2×4×8′ studs, that’s your base, legs, and roof perimeter.
Add 10–12 pieces of 2×2×8′ for rails, trim, door frames, and run panels.
Plan on 1–2 sheets of 3/4″ plywood, 4’×8′, for the floor and main walls.
For outer cladding, add 1 sheet of 1/2″ or 5/8″ plywood or siding.
Optional 1×4 slats: 12–24 pieces.
Plan on sizing your hutch for adequate room—12 square feet for one rabbit.
Add extra 2×2 and 1×4.
Hardware Cloth And Fasteners
With your lumber picked out and cut, it’s time to grab the hardware cloth and the fasteners that keep it tight and secure—because flimsy mesh is how predators and even curious rabbits find weak spots.
For an easy rabbit hutch, use 16-gauge galvanized hardware cloth, often half-inch squares (½ in × ½ in).
Choose roll widths like 36 in or 48 in, then cut panels slightly oversized.
Stretch cloth tight over the frame.
Use heavy-duty galvanized staples on wood, or exterior-rated weatherproof screws with large washers, especially near doors.
For extra security, bury the bottom edge slightly.
Cutting List For Simple Build
Now grab your tape measure and cut list, because nailing down your lumber sizes first makes the whole rabbit hutch build go smoother.
Start with the frame. For a simple one-compartment unit, cut 2×2 pieces: 4 at 48″, 6 at 45″, 3 at 25″, 8 at 33″, plus 3 at 21″ and 1 at 20 1/2″ for mid-rails and bracing.
Next, cut 2×4 legs, about 28–36″ high; for example, 2 at 47 1/2″ and 2 at 29 1/8″.
Add floor joists: 2 at 48″ and 2 at about 33″.
Then grab your plywood, 1/2″ at 24″×48″.
Build the Hutch Frame, Floors, and Secure Doors
Cut your hutch frame pieces from 2x lumber, then pre-drill and screw everything together using deck screws, and check the corners for squareness before you fully tighten.
Next, lay down the floor base—solid non-metal boards lined with bedding like paper litter, hay, or straw—then add a resting mat so your rabbit’s feet stay comfy.
Finally, build the door frames to match your openings, brace them with corner brackets, and hang the doors with rust-resistant hinges so the hardware cloth stays tight and nothing can wiggle loose.
Cut Frame With 2x Lumber
First, plan your frame size and height before you touch the saw, because that foundation decides how sturdy (and how comfy and safe) the whole hutch will be.
For a common medium hutch, cut a 48×24 in rectangle from four 2x boards: two 48 in rails, two 24 in ends.
If you want an elevated base, cut floor joists from 2×4—two at 48 in, plus two crosspieces sized to your interior width (like 33 in).
Cut straight, weather-ready 2x lumber, then drill pilot holes before driving 2–2½ in deck screws.
Install Floors And Secure Doors
With your frame solid and square, you can install the flooring and lock down the doors—the two things that keep feet safe and predators out.
Choose solid, non-slip, easy-to-clean material.
Wood or linoleum works well, but cover anything shiny or slippery with absorbent material like newspaper.
Avoid full wire floors for resting areas; aim for at least one-third solid, preferably non-metal.
Add 2×2 supports, then fit 1/2–3/4 in plywood panels snugly, smooth edges, and screw them down.
For doors, skip small turning catches.
Use top-and-bottom tower or padbolts, tight on all sides.
Then test, tug hard, and smile.
Add Weatherproofing, Ventilation, and Predator-Proof Mesh
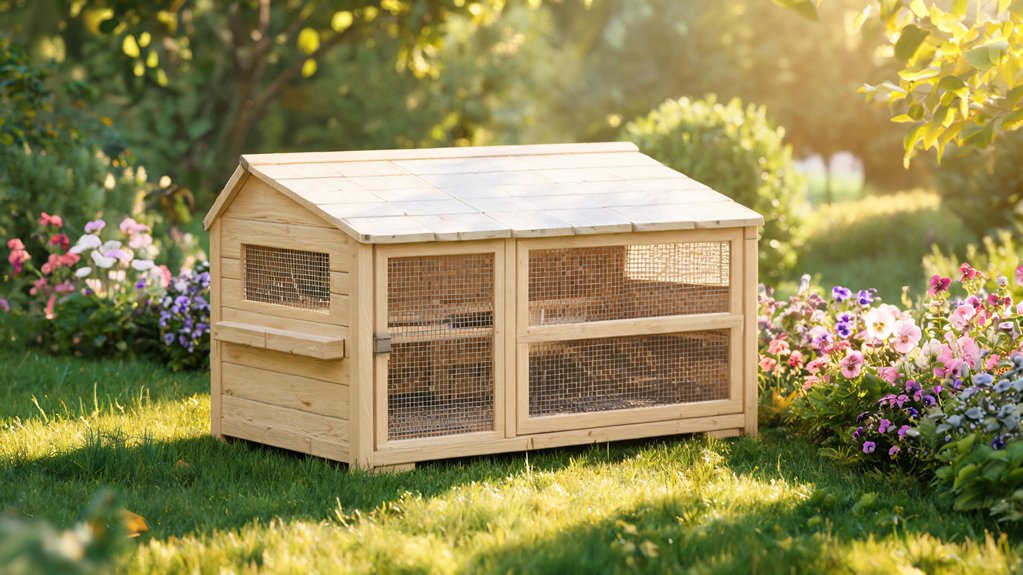
To keep your DIY rabbit hutch safe and comfy, you’ve got to think about weather, airflow, and predators all at once.
Start with a waterproof roof: use solid timber or plywood plus roofing felt and sealant, then add an overhang to push rain away from openings.
Raise the floor on blocks, so wet ground, frost, and floods can’t soak the base.
Paint or varnish exterior panels with weatherproof coating.
For ventilation, use wire or flyscreen sides for light, but add small high vents to vent warm, moist air.
For predators, swap chicken wire for 16‑gauge hardware cloth, 1/2‑inch mesh or smaller, and reinforce weak spots with 6G wire.
Comparing your build against a commercial outdoor rabbit cage can help you confirm that your hutch provides adequate enclosure fit, with enough room for your rabbit to stretch out and hop.
Set Up the Run, Ramps, and Safe Ground-Level Access
Next, set up the run and ramps so your rabbits get continuous, safe play time every day—because a hutch alone isn’t enough.
Attach the run permanently to the shelter or shed, so they can move 24 hours between sleeping and exercise.
Aim for at least 3m x 2m x 1m (about 10ft x 6ft x 3ft) total space for two, and give 6–8 m² run area.
Add a gentle, low ramp linking the raised hutch to the ground-level run, no abrupt steps.
Keep shelter spots shaded and dry.
Use a 0.6 m (2 ft) doorway, plus sturdy double-latch.
Inspect soil, fill holes fast.
Bury anti-dig mesh 30–50 cm deep.
For supervised play or a flexible indoor or outdoor setup, consider a Midwest exercise pen as an addition to the permanent run.
Troubleshoot Common Rabbit Hutch Build Mistakes and Hazards
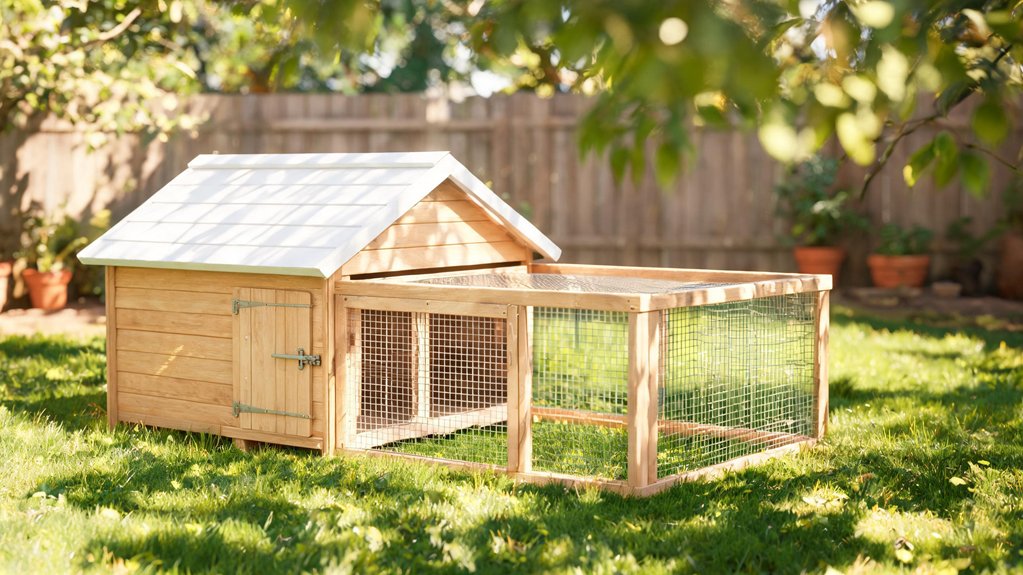
Before you even screw the last panel in place, do a quick “hazards check” on your DIY rabbit hutch plan.
Start with space: aim for at least ~12 sq ft per rabbit, and build clear zones for rest, toileting, and activity.
Add an enclosed, dark sleeping box so your bunny feels safe.
Then fix the floor: avoid all-wire.
Use solid non-slip resting panels to prevent sore hocks.
Skip sawdust bedding, choose low-dust bedding.
Use hardware cloth, not chicken wire, and install secure, raccoon-proof latches.
Finally, protect from sun, rain, flies, and keep chewed wires and treated wood out of reach.
Frequently Asked Questions
Can I Use Chicken Wire Instead of Hardware Cloth for Safety?
No—don’t use chicken wire for rabbit safety. Predators can reach in, enlarge gaps, or tear it open. You’ll sleep better with 1/2-inch galvanized hardware cloth, plus tight latches and secure framing.
What Type of Lock Works Best to Prevent Rabbit Escape?
Top choice: a heavy-duty steel slide bolt or toggle/draw latch on every door—then add a keyed padlock or locking carabiner as backup. Most escapes happen through weak latches, so you’ll serve safety with dual locking.
How High Should the Ramp Be, and Do I Need a Non-Slip Surface?
Keep the ramp landing about 30–40 cm high, and make the ramp angle gentle (20–30°). Yes, add a non-slip surface—use carpet, rubber, or textured mats—so your rabbit’s paws don’t slide.
How Often Should I Replace Bedding and Inspect for Chewing Damage?
You should spot-clean bedding daily, removing wet soiled spots and uneaten hay. Replace all bedding at least weekly. Check for chewing damage every day—look for gnawed corners, loose panels, and damaged cables, then remove or repair immediately.
What’s the Best Way to Waterproof Plywood Without Trapping Moisture Inside?
Use exterior primer plus 2–3 coats of quality exterior paint on dry, clean plywood. Focus on edges and end grain. Apply multiple thin coats, let everything fully cure, and avoid coating damp panels to prevent trapped moisture.