Plan a DIY rabbit enclosure that’s at least 3m x 2m x 1m for two rabbits, plus an attached run so they can never be stuck in the hutch. Aim for solid flooring where they rest, and welded wire mesh with small gaps (about 13–25mm) on the run, plus a 6–12 in trench or L-shaped dig apron to stop burrowing. Build a loop layout with 3 full-hop paths each way, add shaded corners for hay and litter, and check locks at dusk—keep going and you’ll pick up more smart tricks.
Swift Summary
- Plan a 3m x 2m (minimum) shelter plus attached run, aiming for 6–15m² total activity space.
- Build with welded wire mesh (14–16 gauge walls, 16 gauge floor) and small openings (≤1/2 in).
- Stop digging by trenching 6–12 inches, adding a buried mesh apron, and pinning mesh tight.
- Add ventilation with high eave mesh panels and protected low inlets to prevent drafts and overheating.
- Use solid, non-slip flooring and zone the space for sleeping (darkest corner), toilet, and play.
Plan a DIY Rabbit Enclosure Size for Two
If you’re planning a DIY rabbit enclosure for two, start by getting the size right—because cramped space harms movement and choice.
For a diy rabbit enclosure, aim for at least 3m x 2m footprint, with shelter plus exercise built together. That’s about 60–65 sq ft.
If possible, provide more than the minimum recommended rabbit living space to support greater activity and overall happiness.
Plan 6m² minimum floor area, but go to 12–15m² if free running time stays limited.
Place the longest side to allow three hop lengths per rabbit.
Keep height at least 1m, so they stand fully without ear tips touching the roof.
For an indoor rabbit enclosure, consider a roomy pen with safe vertical platforms.
Use Minimum Hutch and Run Dimensions Safely
Once you’ve planned a solid enclosure size for two, your next job is making sure the “minimum” hutch and run you build actually work together, not against your rabbits. When you’re figuring out how to make a rabbit cage, treat 3m x 2m x 1m (about 10ft x 6.5ft x 3.25ft) as the safety baseline, not the dream. If you use “minimum” sleeping options, like 6ft x 2ft x 2ft ideas for rabbit hutches, you must guarantee constant access to that larger run. Never confine them to the hutch alone. Providing adequate space supports behaviours and resting postures important to rabbits, so your housing should allow them to move and reposition comfortably. For ideas for indoor rabbit enclosure, link shelter and exercise.
Design for 3-Hop Movement in Every Direction
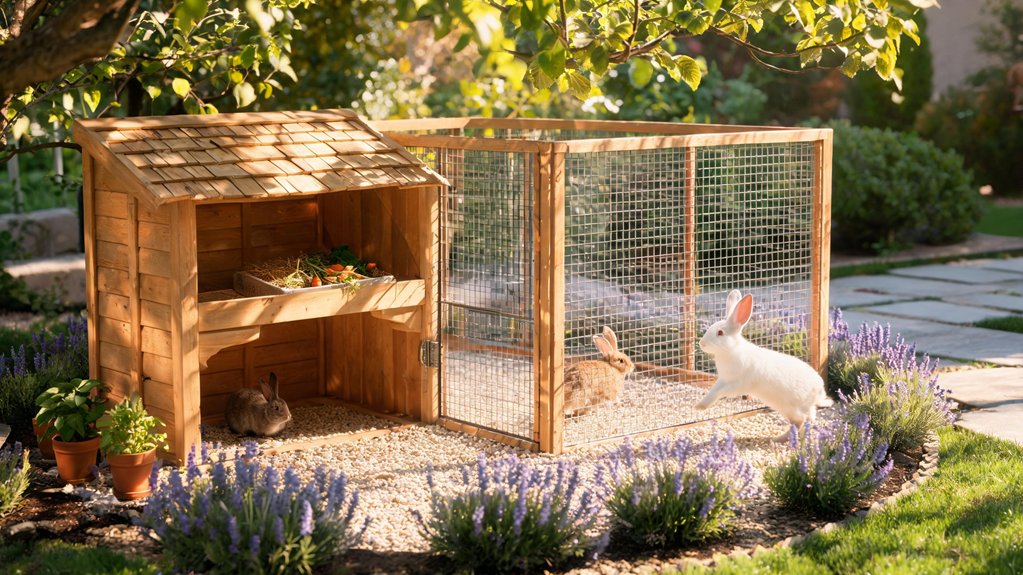
When you build your DIY rabbit cage or enclosure, plan for three full hops straight down the length, so your rabbit can do normal hop-run-rear sequences without getting stuck. Make sure the floor layout also lets them stand up for a full stretch—check they can rear without ears touching the roof, which is just the height test that keeps movement comfortable. In intensive systems, housing conditions like space can directly affect animal health, behavior, and product quality. And don’t forget bidirectional routes: you want easy access between food, water, and litter, so they can hop three times forward or backward, plus turn without bumping into walls or furniture.
Plan Three Hop Lengthwise
Plan your rabbit enclosure around a simple goal: you want your rabbit to take three full hops in a straight line, and do that not just forward, but in every direction.
When you build a diy rabbit cage, use ideas for rabbit enclosures that give a clear lengthway run.
Measure your rabbit nose-to-toe when fully stretched, then plan an internal length about 3× that body length, roughly 1.2–1.5 m for small–medium, 1.8–2.1 m for giants.
Keep the path unobstructed, no ramps blocking.
For diy rabbit cage indoor setups, add the same clear run, then close safely with sturdy sides.
Enable Upright Full Stretch
To help your rabbit do three full hops in every direction, you’ve got to design for the “stand tall” moment.
When you build your DIY rabbit cage, plan vertical clearance for rabbit enclosures first.
For medium rabbits, aim for at least 1 meter clear internal height, so they can stand fully upright, ears included.
For outdoor rabbit enclosures, use at least 0.6 m inside height.
Add shelving only if your top won’t brush their ears.
Make floor space big too—use vertical levels and ramps, but keep upright room on each tier.
Serve comfort, then movement.
Ensure Bidirectional Movement Routes
Bidirectional movement routes are what help your rabbit do that steady, confident “three-hop” travel in every direction—without hitting walls or getting stuck in corners.
Plan DIY rabbit cage layout with a 3m x 2m open central zone, and run straight paths at 3m+ along two axes, so they can hop, turn, and return.
Around the perimeter, add continuous circulation, no dead ends.
Align doorways, tunnels, and archways to opposite sides, so you get looped movement.
In your rabbit pen ideas, keep feeding, resting, and toileting at opposite ends.
Also make sure the shelter door stays open to exercise pens for steady roaming.
Choose the Right Shed Size for a Rabbit Build
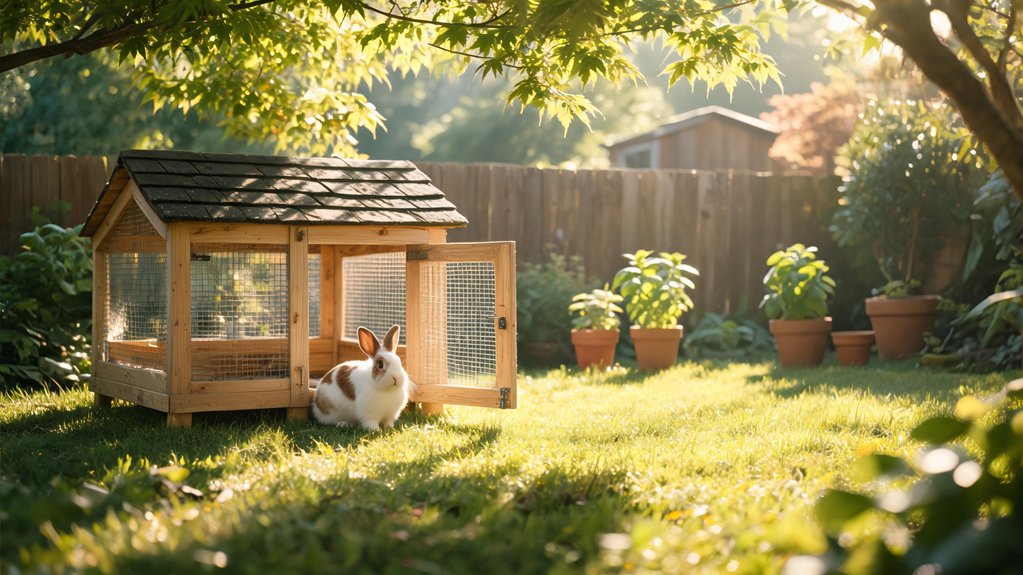
When you choose a shed size for your DIY rabbit build, you’re really choosing how much space your rabbits get to hop, stretch, and stay comfortable day after day.
For solid ideas for rabbit cage, rabbit house ideas, and rabbit hutch ideas, aim for at least 3m x 2m x 1m high as one continuous enclosure for two medium rabbits, about 60 sq ft.
Even better, start with 10ft x 8ft, so you can add fixtures and still meet floor needs.
For two, plan at least 6m² floor area.
Add 20% per extra rabbit, always.
Pick the Right Welded Wire Mesh Specs for Runs
Choosing the right welded wire mesh for your rabbit run makes the difference between “it works” and “it lasts,” so don’t rush this step.
For ideas for rabbit runs and ideas for rabbit house, pick 14–16 gauge wire for walls, and 16 gauge welded mesh for floors, so it supports weight and resists chewing.
For stronger, more exposed panels, use 12 gauge.
Aim for 1/2″ openings, or 13–25 mm, to block head access and small predator entry.
Use hot-dip galvanized or GAW. Keep coatings intact.
When you build ideas for rabbit cage, size gaps to prevent limb trapping.
Rabbits fed a suitable diet, such as one from the Oxbow rabbit food line, are generally less inclined to gnaw on enclosure materials.
Anchor Fencing to Stop Tunneling and Burrowing
After you pick the right welded wire mesh specs for your rabbit run, it’s time to stop the sneaky part—tunneling.
Dig a trench 6–12 in deep all around.
Stand galvanized wire vertically, tie it to above fencing, then backfill with soil or turf so there’s no easy starting spot.
Next, build an L-shaped digging apron at the fence base, with the flat leg 12–18 in outward and anchored with spikes.
Add hard edging—rocks, bricks, or pavers—several inches down to block burrows.
Finally, pin mesh tight with ground stakes or rebar.
These rabbit ideas for cage support healthier, happier days—and safe, DIY rabbit cage plans.
Add Secure Doors and Bolts to Block Foxes
Now you can make your DIY rabbit cage truly fox-proof by building secure doors, not just “close-enough” ones.
Pick heavy-duty outdoor hinges, then use lockable bolts and a tight door-to-frame fit, so there are no gaps at the top, sides, or threshold.
Use heavy-duty outdoor hinges and lockable bolts with a tight door-to-frame fit—no gaps at the top, sides, or threshold.
Next, add a two-step lock.
For example, use a slide bolt plus a carabiner, or a latch plus a padlock. Two-step means two motions, like slide then unclip, which foxes struggle to defeat.
Finally, check every dusk before night.
Close fully, latch low and high on bigger doors, and keep hardware rust-resistant.
Build Weatherproof Shelter With Good Ventilation
Once your fox-blocking doors are locked down, you’ll want the shelter itself to handle real weather without turning into a stuffy, damp box. Build it dry, waterproof, and windproof. Use treated cladding and a waterproof roof, then place the hutch away from ground drafts and heat sources. Aim for comfort, roughly 61–72°F inside.
Next, plan ventilation. Add cross‑airflow using vents or welded mesh panels opposite each other. Put one set high near roof eaves, and add inlets around half the shed height. This lets warm, stale air escape, without blowing cold air right on rabbits.
If fully enclosed, consider a fan. If you’d rather skip construction, consider ready-made weatherproof outdoor rabbit hutches, which are designed with waterproof roofs and ventilated panels.
Use Solid Flooring That Blocks Digging and Escape
Solid flooring makes a big difference for your rabbits, because it helps protect their feet and it stops escape routes that wire floors can create. You want a non-slip base, too.
Solid flooring protects rabbit feet, prevents escape routes from wire floors, and provides a non-slip base.
Use sealed timber, concrete, tiles, decking, or plastic/vinyl that’s easy to wash. Avoid bare metal.
And if you build an outdoor run, lay solid flooring or mesh over the entire footprint, so rabbits can’t dig under.
For extra safety, add a wire skirt, at least 12 inches wide, around the base.
But remember: you’ll clean solid floors more often. Keep a dedicated litter zone, and redirect digging with a box. Before you build, check enclosure fit so the solid flooring you choose matches the size and layout your rabbits need.
Choose Materials Rabbits Can’t Chew Through
When you build your DIY rabbit cage, pick materials rabbits can’t chew through, starting with welded wire hardware cloth and chew-resistant metal framing like stainless steel or tough steel wire. Keep a suitable rabbit brush nearby, matched to your rabbit’s coat type and shedding needs, so grooming stays easy inside the enclosure.
Use chew-proof fasteners and smooth, rounded edges on doors and corners, because exposed trim is where they test weak spots, fast.
Then go one step further, choose powder-coated or non-toxic finishes, and make sure everything is fully cured so flaking or scraped bits don’t become a problem after about a week of use.
Welded Wire Hardware Cloth
For a DIY rabbit cage, welded wire hardware cloth is one of the safest choices because rabbits can’t easily chew through it, and the small openings help stop escapes. Choose welded mesh, not chicken wire.
Welded squares or rectangles form rigid grids, and every joint is welded, so a small break won’t spread as far.
Pick a heavy gauge, like 16g or 14g, lower numbers mean thicker wire.
Use 1 in (25 mm) max square openings, or go smaller, like 1/2 in by 1/2 in, for extra security.
Use galvanized or hot-dipped galvanized for weather and rust resistance.
Chew-Proof Fasteners And Frames
Chew-proof fasteners and frames start with one rule: you need metal—and tight joints—where your rabbit can reach. Choose heavy-gauge stainless or powder-coated steel for the frame, ideally at least 1.2 mm, so strong teeth can’t grab soft spots. Then reinforce corners and edges. Use J-clips around 5/16 in x 1/2 in to coil tight wire joints, and hog rings for pull points. Close hog rings with proper pliers so the connection can’t loosen.
For bases, pick metal-reinforced, recessed edges on plastic or add aluminum edging on ramps. And check door latches, too.
Set Up Sleeping and Exercise Zones With Tunnel Access
Next, set up your rabbit’s space in clear zones, so your bunnies can sleep comfortably, toilet in one spot, and play somewhere else—without you constantly rearranging things.
Place a sheltered sleeping hutch or box in the darkest, driest corner, with warm, dry bedding: newspaper under soft, dust-free hay.
Keep it away from sun, heaters, and draughty passages.
Keep your rabbit’s home out of direct sun, away from heaters, and away from draughty passages for safer, calmer comfort.
Then attach a larger, open exercise run nearby, long enough for end-to-end hops and wide for turning.
Finally, route tunnels between them using modular PVC or plastic pipes.
Choose above-ground “flyover” sections or buried, shaded runs. When choosing tunnels, pick designs that encourage exploration and hiding so your rabbits stay active between zones.
Install Ramps, Trays, and Easy-Clean Access Points
Once you’ve split the space into sleep and play zones, you’ll make life easier by adding ramps, trays, and clean-out access points.
First, install a sturdy wooden ramp. Use exterior-grade 2×2 rails about 31.75 in long, add 2×2 rungs every 7.5 in, then screw with 2.5 in exterior screws. Wrap the ramp with hardware cloth for grip, so your bunny doesn’t slip.
Next, add a pull-out tray under the wire floor. Aim for smooth sliding, tray-deep containment, and a urine guard to limit splashes.
Finally, include lockable doors and removable roofs or side panels, so you can spot-clean daily and deep-clean weekly.
Add Enrichment: Tunnels, Platforms, and Chew Toys
Now you can level up your rabbit’s enclosure by adding enrichment, and you’ll be amazed how much more “rabbit-y” it feels.
Add tunnels as backup burrows.
Choose cardboard boxes with cut holes, thick cardboard tubes, wicker, fabric tunnels, or smooth PVC/ceramic pipes.
Add cardboard boxes, wicker, fabric tunnels, or smooth PVC/ceramic pipes to create cozy, rabbit-friendly pathways and backups for burrowing.
Aim for at least two openings, an entrance and an exit, so they don’t feel trapped.
Connect tunnels between hidey houses to form a warren-like route.
Place platforms at different heights, using sturdy boxes or steps with non-slip surfaces like seagrass or straw.
Offer chew toys: grass hay, untreated hardwood, willow, bamboo, cardboard, or hay blocks.
Avoid rubber, most plastics, metal, fabric, and carpet pieces.
Toys designed for chewing, play, and exploration give your rabbit varied ways to stay active and engaged within its enclosure.
Manage Bedding and Litter for Easy Daily Cleaning
Daily cleaning gets way easier when you manage bedding and litter like a system, not a chore you dread.
Start with safe, absorbent stuff: paper-based pellets or wood pellets, or rabbit-safe dust-extracted litter pellets. Choose options with strong moisture absorption so wet spots stay contained between scoops.
Add a thin newspaper base, then use about 1 inch of paper bedding in the box.
Top with ~1 inch grass hay or soft straw so your rabbit toilets in the same spot.
Place litter boxes in favorite corners, using large low tubs for easy scoops.
Check daily, scoop wet spots and clumps, then add a little fresh litter and hay.
Plan full changes every 1–3 days.
Control Winter Warmth Without Drafts or Overheating
After you’ve got bedding and litter working like a system, you can turn to winter comfort—without accidentally making your rabbit’s home too drafty or too hot.
Aim for 10–20°C (50–68°F). If it drops below 10°C, help fast.
Don’t rely on airtight sealing. Place the hutch with a solid back wall to block prevailing winds, and seal small gaps around doors and bases.
Use double-wall insulation, or external covers, but keep airflow. Never let insulation get wet. An external winter rabbit hutch cover alone does not guarantee safe temperatures, so check the interior regularly.
In sunny, glazed areas, watch closely and vent.
Add straw for passive warmth, or use a covered heat pad or lamp safely.
Keep heating near 10–20°C.
Convert a Garden Shed Into a DIY Rabbit Home
If you already have a garden shed, you can turn it into a cozy DIY rabbit home—without gambling on space or safety.
First, plan your footprint, aim for at least 3m x 2m, and keep the height near 1m for easy movement.
Add an attached run, about 3m x 2m x 1m, so they can hop fully.
Use solid, non-slip flooring, and block digging with buried mesh under the base.
Then secure everything with strong locks and predator-proof mesh, and add ventilation plus a litter box.
Finally, give 24-hour access, so they’re comfortable at dawn and dusk.
Fix Gaps, Leaks, and Weak Hinges Fast
First, walk around your rabbit home and seal drafts and gaps fast—press along every seam, then plug any openings with exterior-grade filler.
Next, reinforce hinges securely by tightening loose screws right away, and swap any bent or rusted hardware for galvanized parts so it won’t fail outside.
But don’t just “fix,” do a quick check again the next day and weekly after, especially where wire meets the frame, so your bunny stays safe.
Seal Drafts And Gaps
When you seal drafts and gaps in your DIY rabbit cage, you’re basically stopping cold wind and damp air from sneaking in where you can’t see.
First, check roof felt, wall panels, and joints for water stains.
Look at mesh panels, window frames, and door edges for cracks or light leaks.
Then, focus on windward sides, roof edges, and door thresholds.
Apply pet-safe waterproof treatment to outside wood, and repair any damaged roof fast.
Add double panelling, and pack wall cavities with house-grade insulation.
Install door sweeps, and add skirts to block ground drafts, then raise the hutch off the floor.
Reinforce Hinges Securely
To stop those annoying gaps, leaks, and door sag, you need to reinforce your rabbit enclosure hinges like you mean it.
First, tighten hinge screws fully, all the way to full depth, removing hinge play.
If screws feel loose, replace them with slightly larger or longer exterior-rated screws, 2.5–3 inches, into solid framing.
If holes strip, fill with wood glue and toothpicks or a hardwood dowel, then re-drive.
Next, match hinge hardware to outdoor use, use galvanized parts.
Then brace the door—install a diagonal brace or Z-pattern cross-brace—so hinges stop fighting gravity.
Finally, recheck alignment and seal penetrations.
Avoid Common DIY Rabbit Enclosure Mistakes
Before you build or buy your DIY rabbit enclosure, double-check the most common mistakes, because they can cost your rabbits comfort and safety fast.
First, give enough space. Two rabbits need roughly 10 ft x 6 ft x 3 ft outdoor living room, plus a run.
Add a permanent secure run for grazing.
Next, avoid wire-only flooring. Use a solid resting area to protect sore hocks, and swap chicken wire for ½-inch hardware cloth, or rabbits will chew through.
Never use pressure-treated wood on chewable spots.
Choose a non-slippery surface for traction.
Finally, secure doors with strong latches, shade the full resting area, and plan for cooling above 90°F.
Frequently Asked Questions
What’s the Safest DIY Rabbit Cage Size for Two Average Rabbits?
Measure “bigger is better”: for two average rabbits, aim for a single 3m x 2m floor space with at least 1m height. Add a sheltered sleep area at least 1.8m x 0.6m x 0.6m.
Can I Use Chicken Wire for a Rabbit Run, or Is It Unsafe?
No—you shouldn’t use chicken wire for a rabbit run. Rabbits chew and bend it, and predators can bite through. Use heavy-gauge welded wire or hardware cloth with small gaps, plus a secure roof and buried skirt.
How Do I Attach a Solid Floor Without Blocking Drainage and Cleaning?
Attach a solid floor to a frame using spacers or battens, leaving a shallow void underneath. Keep a slight slope (~1/4 inch per foot) toward an external drain. Use removable liners for easy scrubbing, and leave perimeter gaps for runoff.
Do Rabbits Need a Covered Top, and How Deep Should the Run Be?
Yes—cover the top. About 1 in 4 rabbit owners miss overhead predator risk, so you’ll protect your bunny from above. Aim for a 6–8 ft run, plus 30 cm buried mesh to deter digging.
How Often Should I Clean the Enclosure, and What Bedding Works Best?
Clean the enclosure daily by spot-checking droppings and wet spots, then deep-clean the whole habitat weekly. In toilet corners, use shredded paper or newspaper under litter. For bedding, choose dust-free aspen shavings or paper bedding.